Sign Up
How to Storyboard: A Complete Beginner's Guide for Filmmakers
Author:
Narek Ghazaryan
Date:
August 7, 2026

Most beginners think storyboarding requires drawing skills. It does not. A storyboard is a planning document, not a finished illustration. Stick figures, rough shapes, and simple arrows communicate camera direction and character blocking just as well as polished artwork. Learning how to storyboard is about visual thinking, not visual talent.
Streaming platforms invested over USD 50 billion in original content in 2023. Every one of those productions started with a storyboard. Whether you are making a short film, a YouTube video, or a commercial, storyboarding for beginners starts with the same core skill: breaking a script into visual shots. This guide covers the full storyboard creation process from first read to finished panels.
What Storyboarding Actually Is
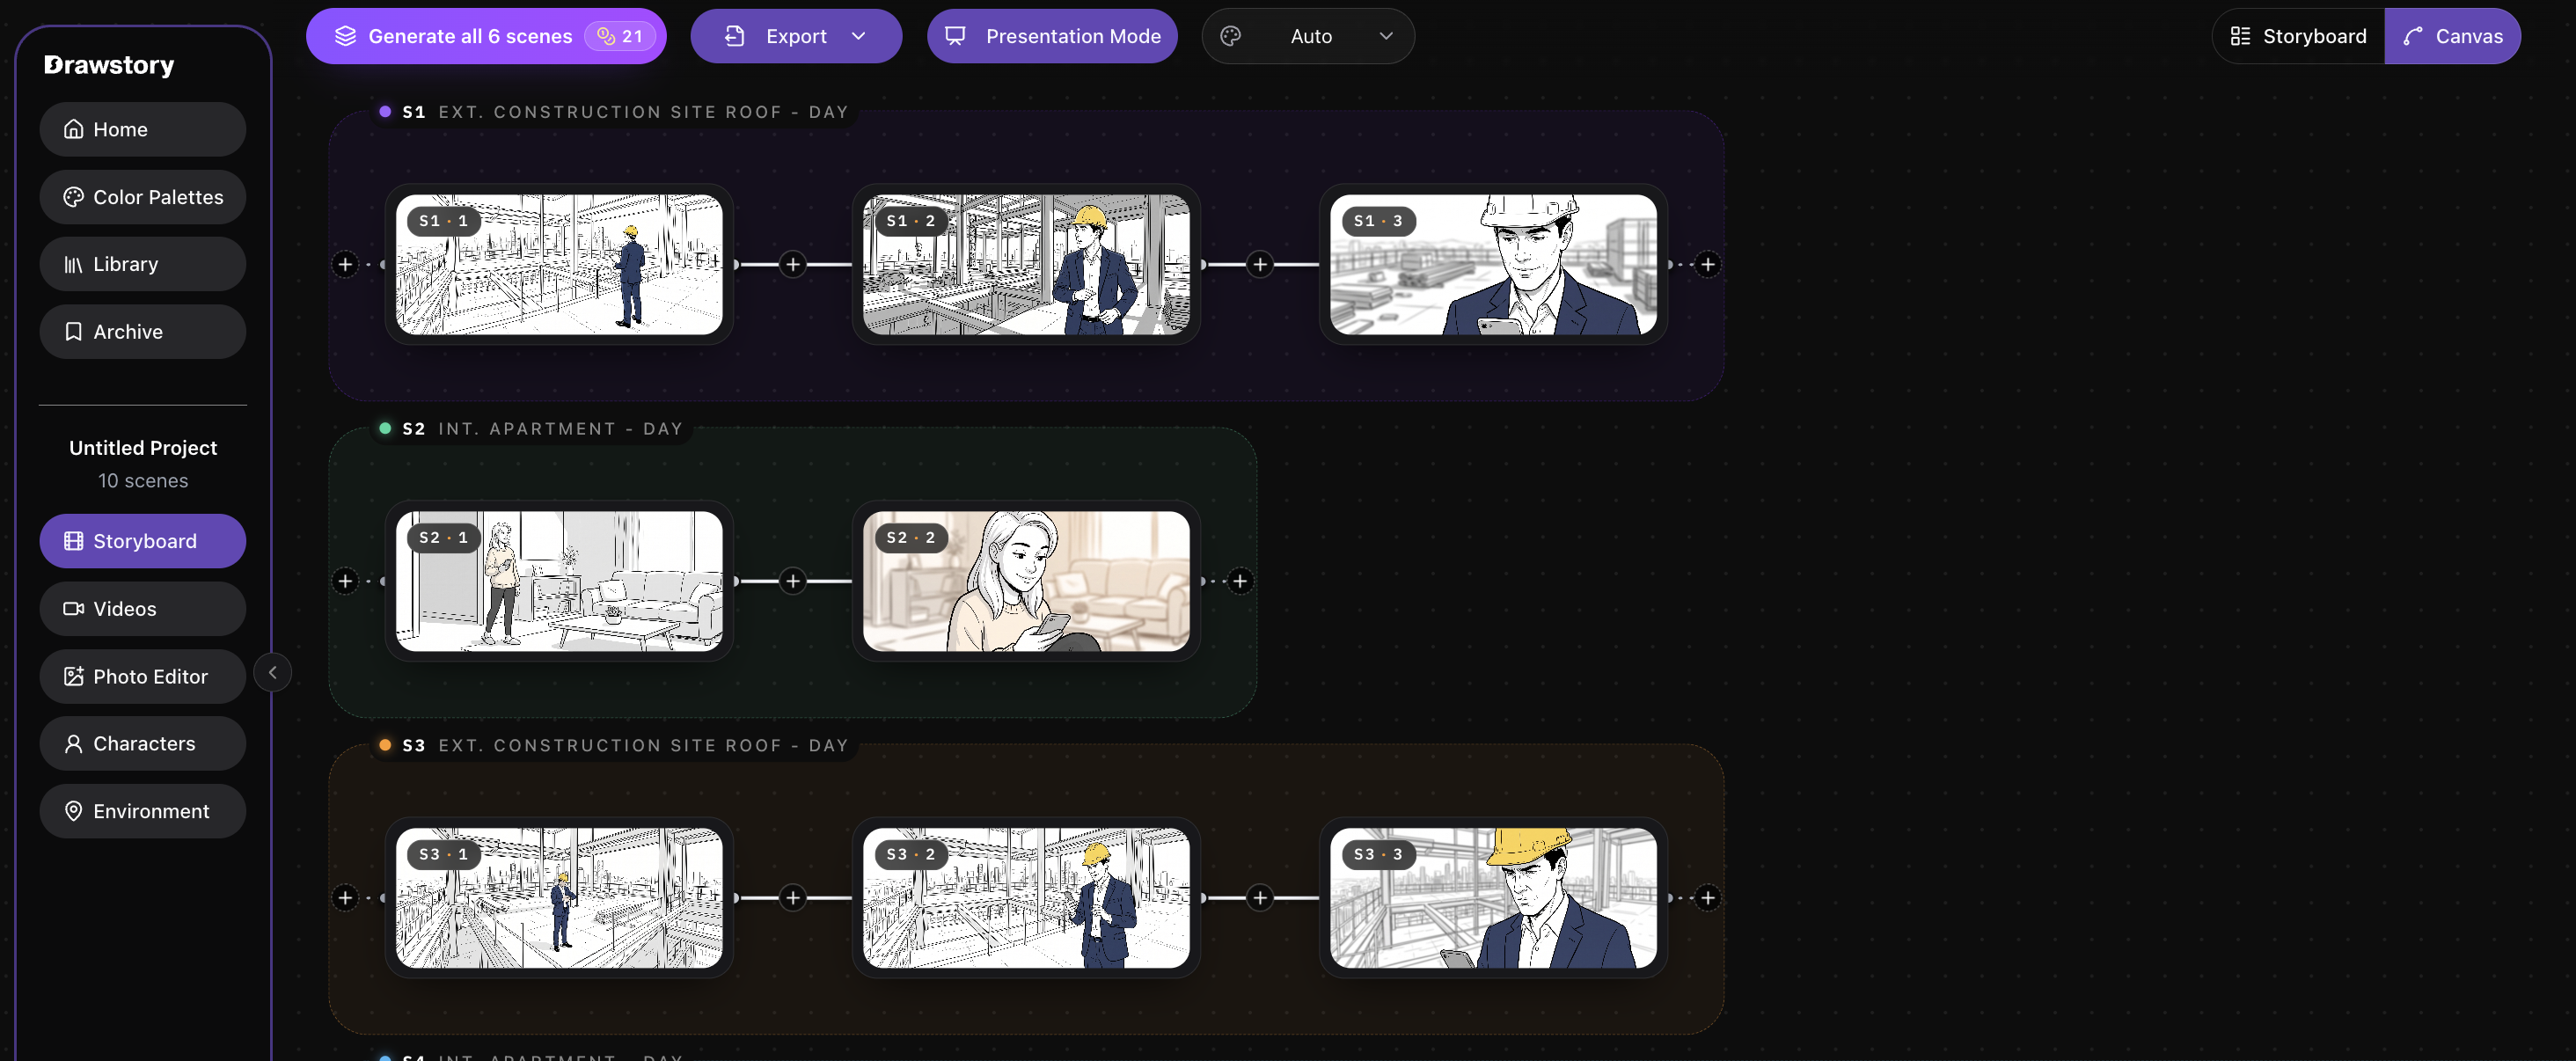
Understanding how to storyboard starts with knowing what a storyboard is. A storyboard is a sequence of illustrated panels that shows what the camera will see in each shot of a film, video, or animation. Each panel represents one shot. Below the panel, notes describe the action, dialogue, camera movement, and transitions. The storyboard creation process turns a written script into a visual plan that the entire production team can reference before a single frame is filmed.
Storyboarding for beginners often starts with confusion about scope. You do not need to storyboard every second of footage. Focus on key moments: scene openings, major character actions, camera moves, VFX shots, and transitions. If a panel helps the crew understand what to shoot, it belongs in the board.
What You Need Before You Start
Before you learn how to storyboard, gather three things. Skipping any of them slows down the process and creates panels that do not match the production.
A Script or Outline
Every storyboard starts with a story. You need a script, treatment, or scene-by-scene outline. Without one, your storyboard will drift from the production plan. A script to storyboard tool can parse your screenplay and generate panels directly from the text.
A Shot Size Reference
Knowing how to storyboard means knowing your shot sizes: wide, medium, close-up, and extreme close-up. These define how much of the scene appears in each panel. Pair shot sizes with cinematic composition techniques like the rule of thirds and leading lines to plan panels that communicate mood and focus.
A Template or Panel Grid
Part of learning how to storyboard is choosing the right format. Storyboarding for beginners is easier with a structured layout. A storyboard template gives you pre-sized panels with fields for scene number, shot description, dialogue, and camera notes. Start with a 3x3 or 4x3 grid. This keeps panel sizes consistent and gives you enough space for annotations without crowding the frame.
How to Storyboard: Step by Step
The storyboard creation process follows five steps. Each one builds on the previous. Work through them in order, and your first storyboard will communicate the visual plan clearly enough for any crew to execute.
Step 1: Break the Script Into Scenes and Shots
Read the script and identify every distinct camera setup. Each time the camera position, angle, or subject changes, that is a new shot and a new panel. Mark these in the script. This breakdown is the foundation. How to make a storyboard starts here: one shot, one panel.
Step 2: Sketch Thumbnail Panels
Draw small, rough sketches for each shot. Use stick figures for characters. Use arrows to show camera movement (pan, tilt, dolly). Use simple boxes and circles for props and set pieces. Speed matters more than polish at this stage. When you learn how to storyboard, you are testing shot sequence and pacing, not creating art.
Step 3: Add Camera and Action Notes
This step is where knowing how to storyboard separates beginners from experienced visual planners. Below each panel, write the shot size (wide, medium, close-up), camera angle (eye level, high angle, low angle), and any movement (pan left, dolly in, static). Add dialogue excerpts and sound cues if they affect the visual timing. These notes turn your storyboard into a document the DP and AD can use to build a shot list for the shoot day.
Step 4: Arrange Panels in Sequence
Lay out the panels in narrative order. Check the flow: does each panel transition naturally to the next? Are the shot sizes varied enough to maintain visual interest? Fix consecutive wide shots by adding medium or close-up transitions. How to storyboard well means reviewing the sequence as a whole, not just individual frames.
Step 5: Review and Refine
Show the storyboard to the director, producer, or client. Collect feedback on framing, pacing, and shot selection. Revise panels that do not communicate the intended composition. For VFX-heavy or high-budget projects, refine selected panels into a cinematic storyboard with detailed lens, lighting, and color data.
Your First Storyboard Checklist
Before you call the storyboard done, run through this checklist. Knowing how to storyboard is one thing. Knowing when it is finished is another. Every item should be present if you want the board to work as a production document.
• Every key scene has at least one panel: Do not leave major story beats without representation.
• Each panel has a shot size and camera angle: Wide, medium, or close-up. Eye level, high angle, or low angle. These two pieces of information tell the DP how to set up the camera.
• Characters are identifiable: Even with simple sketches, the audience and crew should be able to tell which character is in each panel. Label characters by name if your drawing style does not distinguish them. For AI-generated boards, use AI character design to lock consistent character identity across panels.
• Camera movement is marked: Arrows, labels, or notes that indicate pan, tilt, dolly, or static. The crew needs to know whether the camera moves during the shot.
• Dialogue and sound cues are noted: If a line of dialogue drives the visual action or timing, include it beneath the panel. Same for key sound effects.
• Sequence flows without gaps: Each transition should feel intentional. Add intermediate shots where jumps feel jarring. For timing validation, export the panels as animatics and play them back at the intended pace.
Mistakes Beginners Make
Even after you learn how to storyboard, these three mistakes can undermine your boards. Avoid them from the start.
Drawing Too Much Detail Too Early
• Beginners spend hours polishing individual panels before the shot sequence is finalized. When the director changes the blocking or adds a scene, all that detail work is wasted.
• Start with rough thumbnails. Refine only after the full sequence is approved. This is how to storyboard efficiently.
Skipping Camera and Lens Notes
• A storyboard without camera data is just a comic strip. The crew cannot plan equipment, setups, or schedules without knowing what lens and angle each shot requires.
• Add shot size, angle, and movement notes to every panel, even in a rough draft.
Storyboarding Without a Script
• Jumping straight to panels without a script or outline produces a storyboard that does not match the production. The visual plan should follow the written plan, not replace it.
• Write or finalize the script first. Then learn how to storyboard from that document. An AI storyboard generator automates this by reading the script and generating panels with accurate scene data.
Start Storyboarding Today
Learning how to storyboard does not require expensive software or drawing skills. Drawstory generates production-ready storyboard panels from your script in minutes. Upload your screenplay, lock your characters, and get a visual plan your crew can execute.
Frequently Asked Questions
Got Questions?
Find clear answers to common questions about Drawstory, our services, process, and how we bring your ideas to life.
How do I start a storyboard?


Do I need to know how to draw to storyboard?
Is there an AI for storyboarding?
What should a storyboard include?
How long does it take to create a storyboard?



